Monday, November 7, 2011

My Go With Shabby Soul

Well, the past few weeks have been wonderfully crazy! I was able to go down to Aledo, TX for an internship with Shabby Soul. Shabby Soul is made up of two wonderful girls, Brittany and Kasie. I had a blast working with them for 3 days while they were working on a project for Nieman Marcus. It consisted of 5 mannequins that they needed to cover completely with Nieman Marcus magazine clippings. It was a lot of hard work and sticky fingers!! 

Here are a few pictures of the progress we made while I was with them.... ENJOY!!

This is the undressed man-nequin. Doesn't he look amazing? This is not the hair that went on him, we just really enjoy the Bieber look.

This is GLAM!! She is probably my favorite!! We finished her in one, yes ONE DAY!! 

These are the remaining 3 girls: 944, Christmas and InCircle. (All named after Nieman Marcus magazines)

Glam's FAB bling!! Brittany did such a great job!!

Christmas is amazing with the red and white contrast!!

And the crazy 944!! Definitely the wild one of the bunch :) Her skirt is my absolute favorite!! Its made of nothing but necklaces!!

At this point in the process I had to go back home to Oklahoma :(  But I had so much fun with Brittany and Kasie and learned A LOT!! They were so nice for letting me come and join them and I can't wait until I get to go back and help with the other side of their business, interior design and faux finishing furniture! Everyone should check out their website: ShabbySoul.com

Here are the rest of the pictures from the photo shoot!


All 5 of the mannequins!!


Christmas!! She is so chic!!


944 and the lone boy!! 


Christmas' accessories, isn't her bra studding amazing?!?!


Glam! So elegant :) You'll never look at blue the same way again!!


InCircle (aka Green) Cute Dress!


Glam closer up, I love the layering of the necklaces!


Don't you want some sweet suspenders like him? So hot!


944!


Green and Glam!


Did they not turn out amazing?!?! It was so much fun getting to do this!! Thanks again to Kasie and Brittany for taking me under their wing! They are both so talented and I can't wait to go back!! Please take a look at their site or Facebook page: Shabby Soul's Facebook page or ShabbySoul.com! Also, did you not love all that amazing jewelry and studded bras?? It was all done by Gypsy Soule, some good friends of Shabby Soul! Here is their site: GypsySoule.com

Thank you so much for reading and I love you all :)

Sunday, November 6, 2011

U Create

Just a quick little post....but I HAD TO SHARE!!! I've made it onto U Create's blog :) I am super pumped!! It shows the wreath that I talked about in my previous post!!

Here it is: U Create Blog

Hope everyone has a "quake"tastic night and have a Happy "Hangover Appreciation Day" tomorrow :)

-Mal

Monday, October 31, 2011

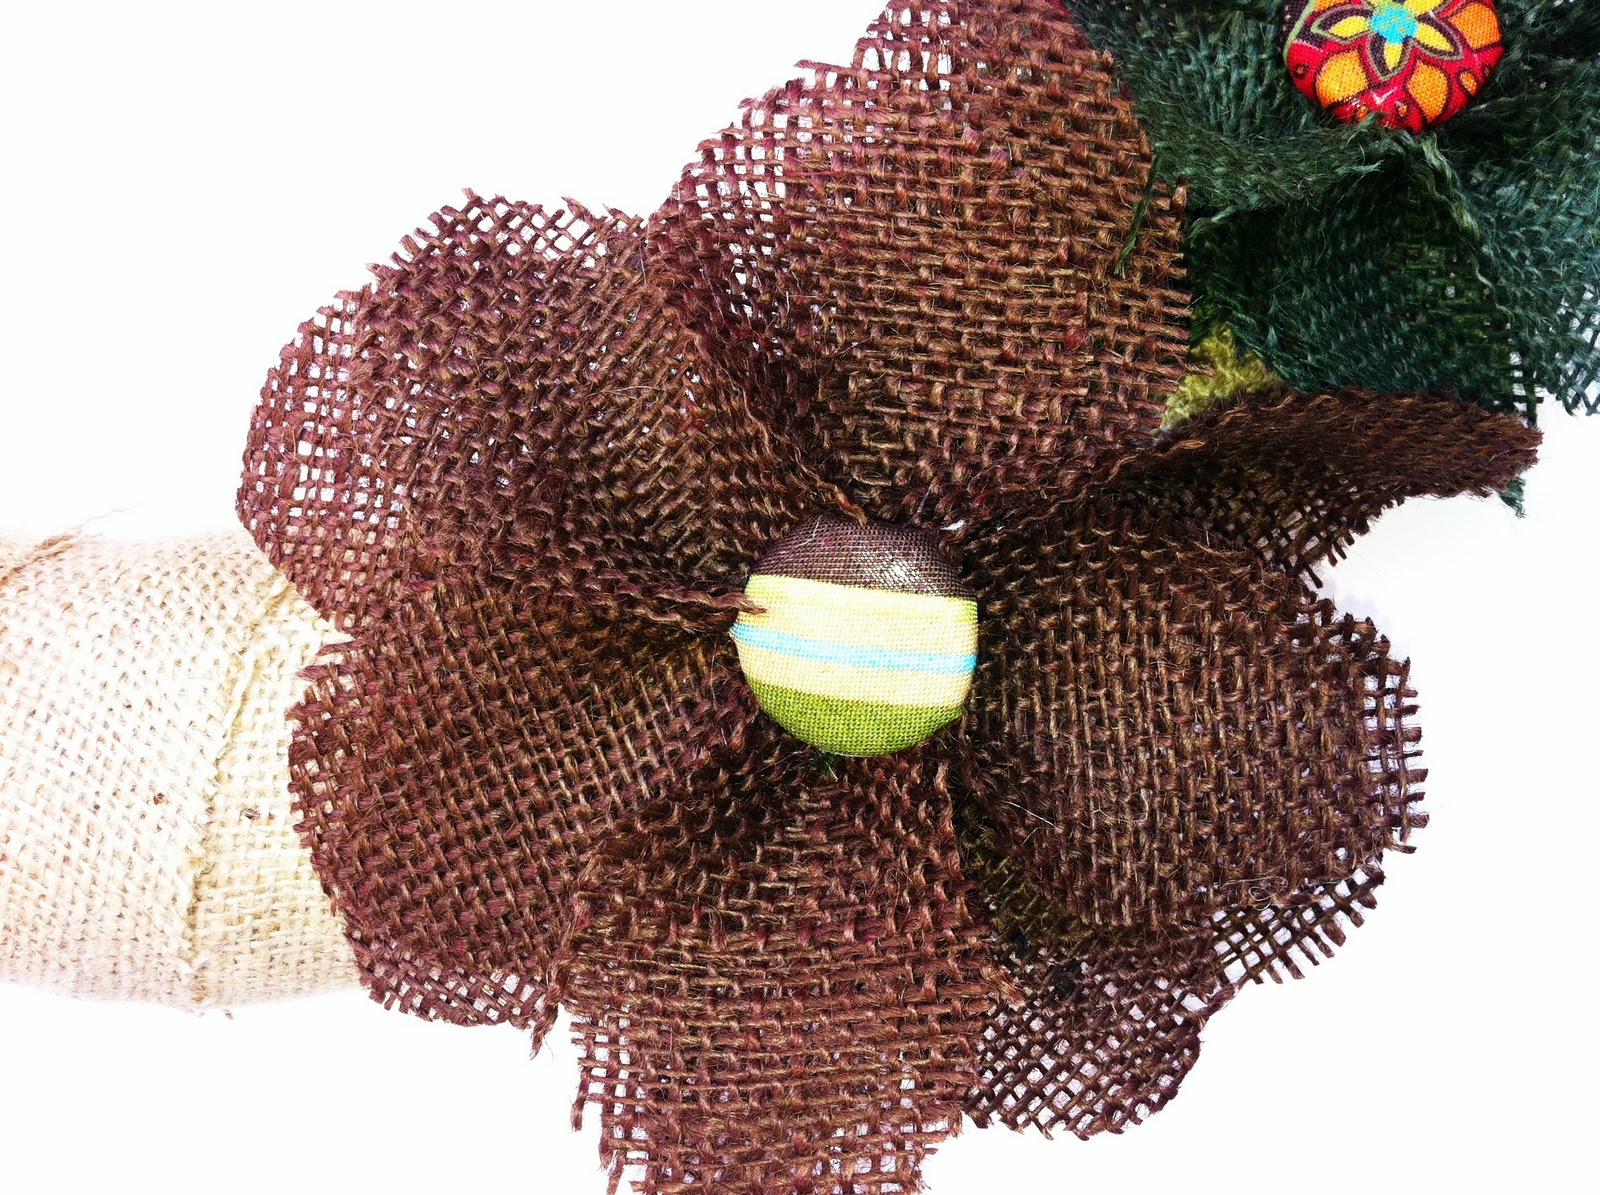
Fall is in the air and Wreaths have hit the doors!

Hey everyone!! I'm sorry that I have been kind of lame lately with my lack of blog postage... My pile of crafts in Jake's house and my Pinterest are frustrated with me also!!

Well, I myself am a HUGE blog fan....of anyone/thing crafty!! This particular page: UCreate I'm a big fan of. Each month I have {STALKED} them wanting to do one of their monthly "Create With Me" crafts. In the past they have made everything from rugs {RUGS!!! How awesome is that?!?!} to cute fabric totes & pillows.Then at the end of the month you email in your crafts and they post them on their blog. Its really a cool way to try new things and to compare how others DIY!

 Well, finally I decided to take the plunge. I asked my friends Mel & Laura to take the plunge with me. I love group craft times!! This month UCreate had an awesome burlap wreath tutorial for us to try out. It took a little longer than we {I} expected....and by longer I mean more than one afternoon. :)

Here is the link to the Wreath Tutorial. Its a really good one....the only thing we did differently was we used a straw wreath form. They are $4.99 and bigger than the Styrofoam forms that H-Lobb had. I really liked them. We actually tried using something I saw on Pinterest first before going with the straw. It said to get foam tubing from the plumbing dept in Home Depot {for about $1.50} and duct tape it together, but the duct tape wasn't holding together as well as we thought. {Next time I might try a pool noodle} Anyways....my only other note is that this is a very messy project. Good thing we have a brand new vacuum cleaner :)

Well....Here are my wreaths!! {Oh yeah, I HAD to give myself options....one FALL and SOONERish} Enjoy!!


My Sooner one :) 


 The roses are my FAVORITE!!


Fall and the one that currently resides on my door :)


Here is Mel's Wreath, Kenley is already a wonderful model :) 


Saturday, October 1, 2011

Pioneer Woman's Cobbler

Raise your hand if you are obsessed with carbs. {ME} 


Raise your hand if you love cobbler {ME} 


Raise your hand if you require dessert after every meal {I think you're catching on....}


Well, this may be the easiest, fruitiest, sugariest{?} dessert ever! This recipe is of course from my cooking idol Ree Drummond aka Pioneer Woman. I saw it on her show last Saturday. {Which if you don't watch you are missing the second best thing to happen to fall Saturdays....Behind OU football, of course!} 


I can't stress enough at how easy this recipe is. Here is the direct link to the recipe on her blog: PW Cobbler.


On her blog, Ree discusses the different kinds of cobbler. Pie Crusty, Cake-like or biscuit. This scrumptious version is cake-like. I don't think I've ever had "cake-like" cobbler before, and I must say that it just very well be my fave!  


This recipe requires minimal ingredients. When I only have to pick up fruit from the store it is a good recipe!!


Ingredients:
1 stick of melted butter, plus a little more
1 cup of sugar, plus a little extra
1 cup of Self-Rising flour
1 cup of milk
2 cups of fruit {I used frozen, mixed berries, but she uses blackberries...whatever tickles your fancy}


First, you melt the butter in the microwave


In a separate dish, mix flour and sugar and then whisk in the milk. Mix pretty well, until most of the lumps are out.


Then add in the butter with a whisk. 


In your baking dish, use extra butter to butter the dish, Ree makes sure to mention the more the better {Hey, I only follow rules!} 


Pour mix into bowl and then add the fruit. Take 1/4 cup of more sugar and sprinkle it on top of the cobbler {this makes it a little crispier on top}. Cook this at 350 for 1 hour. 


Pre-cooked...
 Check out that sugar!!
 Final product!! PW's obviously looks better, but mine tasted JUST FINE!! :)
 Serve with ice cream {DUH!!}

Its so easy, and you just pop it in before you eat dinner and voila!! 


Sunday, August 28, 2011

Pinterest Inspirations!!

Ok, if you are not on Pinterest, not only are you from a different planet but you will suffer from spontaneous combustion in about 5 minutes. This is THE BEST website on the face of the earth. I'm beyond addicted. Its what I do before I go to bed. Its what I do at red lights. Its what I do when watching unnecessarily lengthy shows {such as The Bachelor Pad}. I LIVE on this thing....and most importantly they have a {FREE} IPhone App!!! What I'm trying to say is, I LOVE IT!!

Basically what this {GIFT FROM GOD} is, is a website where you can post and/or view different ideas, fashion, home decor, crafts, wedding ideas, recipes, etc, etc, etc. You name it, they have it on there. Its endless. You like what you see? You just "RePin" it onto different boards, such as "Crafts", "Food Finds" or "My Future Wedding Day" on your page. You have an option to follow your friends {which is made extremely easy through the Facebook sign up option} and "tag" people in ideas you think they would like. This place is awesome! ANYWAYS......Its needless to say that I have about a billion different crafty things running though my head at all hours of the day. My first task at hand: Yarn Balls {for a lack of a better name...}!!!

INSPIRATION:


                                                                   Awesome right? 


HERE I GO: 


I saw these around mid-July and had the PERFECT time and place to try these out. My boyfriend's birthday/house warming party was this past weekend, and he lives, well, kind of in the middle of nowhere. Trees are everywhere, and completely line his driveway, as well as completely block off a view of his house from the main road. Its very romantic, {and perfect haunted house} looking :) OH the possibilities!!! Well, considering I go to his house on average of 3 times a week and constantly miss his non-descript driveway I figured I'd use the yarn balls to help our guests find their way! 


Here's what you'll need : 
Balloons {all sizes and shapes...the really big "punching" ones are fenominal looking!!}
Glue
Water
Yarn or Twine 
Sponge Brush
Paper Plates
Scissors
Wax Paper
Old Towels
Old T-Shirt {just to wear, sometimes glue is tricky to get out}


You will want to mix glue with water in the paper plate {I used a couple plates to avoid soaking through}. I never really used specific measurements, just kind of eyeballed it, but I'd say it would be 1 bottle of glue and 2-3 bottles of water {I just refilled the empty glue bottles with water}. 

On your table you will want to lay down a towel with wax paper over it, to keep from ruining your table. I used the wax paper over the towel because the balloons/glue wont stick to the wax paper. 

Blow up your balloon and dip your yarn into the plate of glue. I used the foam brush to get the glue all over the yarn. I put about 2 feet of yarn in the glue at a time. This was a later realization, as you can see below, I had 2 different methods to start. The "circular" design in the glue below didnt really work, because it would get tangled every time. 


It the "zig zag" design below worked fine, but it went by so slow because I wasn't getting much done at at time {and who has that kind of patience?} 


So, the method I liked was just to put it in, about 2 feet at a time and just use the brush to cover it with glue. You'll get a few tangles every once in awhile, but nothing too bad. 


Before you start to wrap it around, you'll want to squeeze the glue back onto the plate, but not bone dry or anything. If the yarn is too dry, it wont stick to the balloon, and after you pop it, it will "deflate", which sucks...and HAPPENS!! Ugh, all the hard work... :)

After you wrap it to your content {the more the better} slip the last part under and then go over the balloon with the foam brush. 


The first few were a little sparse, so I went back and added more yarn. 

Then you'll lay them out on a towel and wax paper {I learned the hard way that it stuck to the plastic in the pic above}. After a couple hours flip them because all the glue ends up at the bottom and it wont dry. 
After a day or so they will be dry and you can pop them! Some of mine deflated, and it was kind of sad, but when they turn out, it is so cool looking!

So, here they are hanging from the trees looking amazing!! Jake liked them too and helped me put them up in the trees, SO SWEET :) 


Well, there they are! I think these would be so cool at an outdoor wedding. I did one with twine and it was my fave!! Plus, the big punch balloons are so cool looking! Its a fun, cheap and crafty DIY to decorate for any event!! 


Related Posts Plugin for WordPress, Blogger...