Thursday, December 29, 2011

Cinnamon Roll Knock Off

God was thinking of me {and my fam} when he came up with cinnamon rolls. I've had several over the years and I'm very picky...which is unfortunate because the ones I LOVE take forever to make....but Pioneer Woman got it 100% right!!! You can see my post of them here.

One day {or night, or while at work, or while at a stop light, or while at the store, basically every moment of my life} As I was cruising through the bountiful pages of pinterest, I stumbled upon "Cinnamon Roll Cake". WHAT?!?! Had to pin it!! Well, I tried it and it is the bomb{dot com}! I still love PW cinnamon rolls, and they can't be beat. BUT this is a lovely "cakey" alternative that is super easy!! 

Here is the Link: Cinnamon Roll Cake 

Another thing I loved was that I didn't have to buy anything! It was all in my cabinet!! LOVE!! 

Try this. You'll love it. Make sure you have some extra milk, this is very rich!!! 

Wednesday, December 7, 2011

Cinnamon & Sugar Pumpkin Bread

If you are anything like me you are a rusher...don't look both ways before crossing the street, don't always adequately prepare yourself for the bumps ahead... OK, I definitely look both ways but I NEVER read recipes all the way through before starting them. It has kicked me in the butt several times. Whether I have to marinate that chicken for 24 hours {24 hours?!? Who thinks that far ahead?? NOT ME!!} or dough raising and raising for hours at a time. Also, room temp things like butter, milk or eggs. I'm slowly learning and getting better at it. In time I suppose. :)

So, let me begin this wonderful and delicious recipe off by saying/warning the following:

1. Milk will need to be room temp
2. Dough will need to rise at two separate times: first for 60-90 minutes and again for 30-45 minutes
3. Cook time is about 35 minutes 
4. Have your kitchen clean. I have a pretty small kitchen, and with several recipes I have needed to use my counter tops to roll the dough, etc. Besides the obvious of just working in a clean kitchen, before this recipe I did some major scrubbing to my counter tops. 

The Goods:

Bread Ingredients:
2 tbsp unsalted butter
1/2 cup milk
1 pkg active dry yeast
3/4 cup pumpkin puree
1/4 cup white sugar
1 tsp salt
2 1/2 cups of bread flour


1 cup granulated sugar
2 tsp of cinnamon
1/2 tsp of nutmeg
2 tbsp butter

Icing Ingredients:
2 tbsp butter
1/8 cup of brown sugar
1 1/2 tbsp milk
3/4 cup of powdered sugar
1/2 tsp vanilla extract

Let's Get Started!!!
Brown 2 tbsp of butter over med-high heat in a saucepan {let it bubble and make sure it doesn't turn black}
Once browned, remove from heat and carefully add the {room temp} milk, the milk will curdle if is too cold vs the heat of the butter. Then, return to the stove and heat through. 

Pour that into your mixing bowl {a dough hook would be VERY helpful here, or get ready for an arm workout!!} Allowing it to cool to about 100-110 degrees.

Once cooled add your active dry yeast and 1/4 cup of sugar and allow to proof for about 8 minutes. {It will be foamy and the liquid will be cloudy}.

Now we are going to add the pumpkin, salt and 1 cup of flour. Stir until combined and then add the rest of your flour 1/2 a cup at a time. 


Knead the dough for 6 minutes until the dough is smooth, elastic and slightly sticky. If the dough is really moist, add extra flour 1 tbsp at a time. 

Move dough to a lightly oiled bowl, cover with a clean towel and allow to rise in a warm place for 60-90 minutes, or until doubled in size. 

While dough is rising, you will need to brown 2 more tbsp of butter. 

In a small bowl add your sugar, cinnamon and nutmeg and mix well. 

Once your dough is finished rising, take it out and punch it down a little bit and knead for about a minute. On your nice and clean counters {sprinkled with flour} roll our your dough to a 12x20 inch rectangle. Take you butter and pour over the dough and spread over all the dough.

Take your cinnamon and sugar mixture and sprinkle evenly onto the dough, then with your fingers, press the mixture into the dough. Now take a knife or a pizza cutter and cut the dough into 6 strips horizontally and vertically.

Stack the strips into a greased loaf pan. {See all that sugar and cinnamon on your counter top? I just swiped mine on top, the more the merrier!!} 

Cover with a clean towel and let rise for 30-45 minutes.

Preheat your oven to 350 degrees. After rising, let it bake for about 35-40 minutes, or until the top is a deep golden brown. 

While baking, prepare your icing. 

Heat the milk, butter and brown sugar in a saucepan over medium heat. Bring to a boil and then immediately remove from heat and stir in the vanilla and powdered sugar. 

Pour icing over the loaf once it is finish and ENJOY!!!


It is such a scrumptious dessert & the pumpkin is not that strong of a flavor. {You could actually add more if you want more of a pumpkin presence}


It's ooey and gooey and great! Its a perfect dessert for the upcoming holidays!

Monday, December 5, 2011

Wedding Invite Turned Christmas Ornament!

Shocker...Another Pinterest inspired project. I may never have another original thought again... Oh well, this is the one that I've seen on Pinterest: 
Really cute, but I really wanted to see more of the wording on through the ornament.

First you get you invite. 
Super fun wedding by the way :) Aren't their invites cute? I love the flowers!

Second, you are going to shred the invite. I worked around the wording, so that it would show through the ornament.
Your stack will look like this:
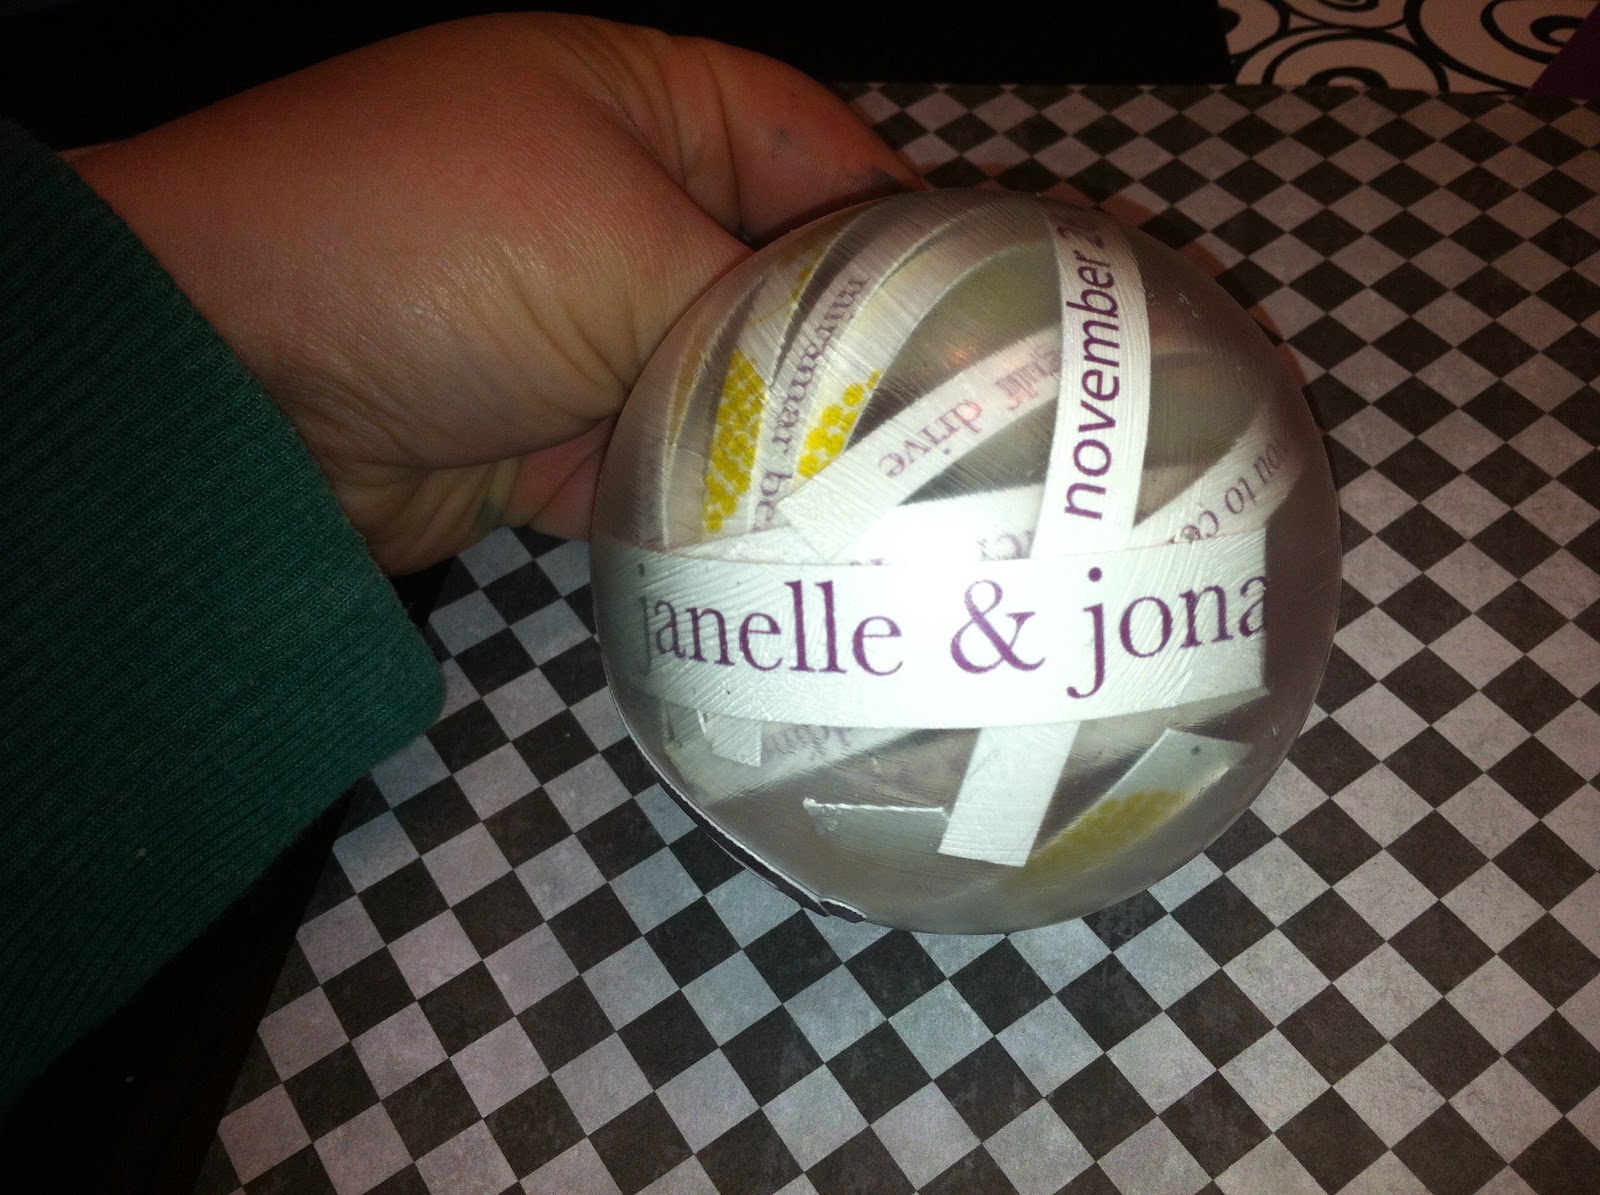
Then you are going to start "strategically" putting different pieces of the invite in...I waited last for their names, the date and a few good pieces of the flowers and put them in last, so that they would be the most visible. 

I kinda just worked them around with a utensil from my cricut tools. Once I got them arranged I decided to add a little something to it...any excuse to bust the 'ol ball n chain out :)
CRICUT TIME!!!

 I decided to cut a "B" out for Boston and then on the opposite side put the date.
I also added the pearls to go in between the numbers. I adhered the paper with mod podge. It worked well, you kind of had to hold it in place because it was such a slick surface, but they stayed eventually. The only downfall was that the mod podge left "gluey" marks all over the ornament. In the back of my mind I knew it would happen, but I did it anyways....no way around it that I could think of. {I also considered writing on the ornament, but decided against it because I kept messing up on my "practice" bulb".} Well, with no way around the gluey residue, I just painted the glue all around it. It kind of gave it a frosty look. It turned out pretty cute in the end. I was happy with it! 


Related Posts Plugin for WordPress, Blogger...