Showing posts with label decoupage. Show all posts

Monday, December 5, 2011

Wedding Invite Turned Christmas Ornament!

Shocker...Another Pinterest inspired project. I may never have another original thought again... Oh well, this is the one that I've seen on Pinterest: 
Really cute, but I really wanted to see more of the wording on through the ornament.

First you get you invite. 
Super fun wedding by the way :) Aren't their invites cute? I love the flowers!

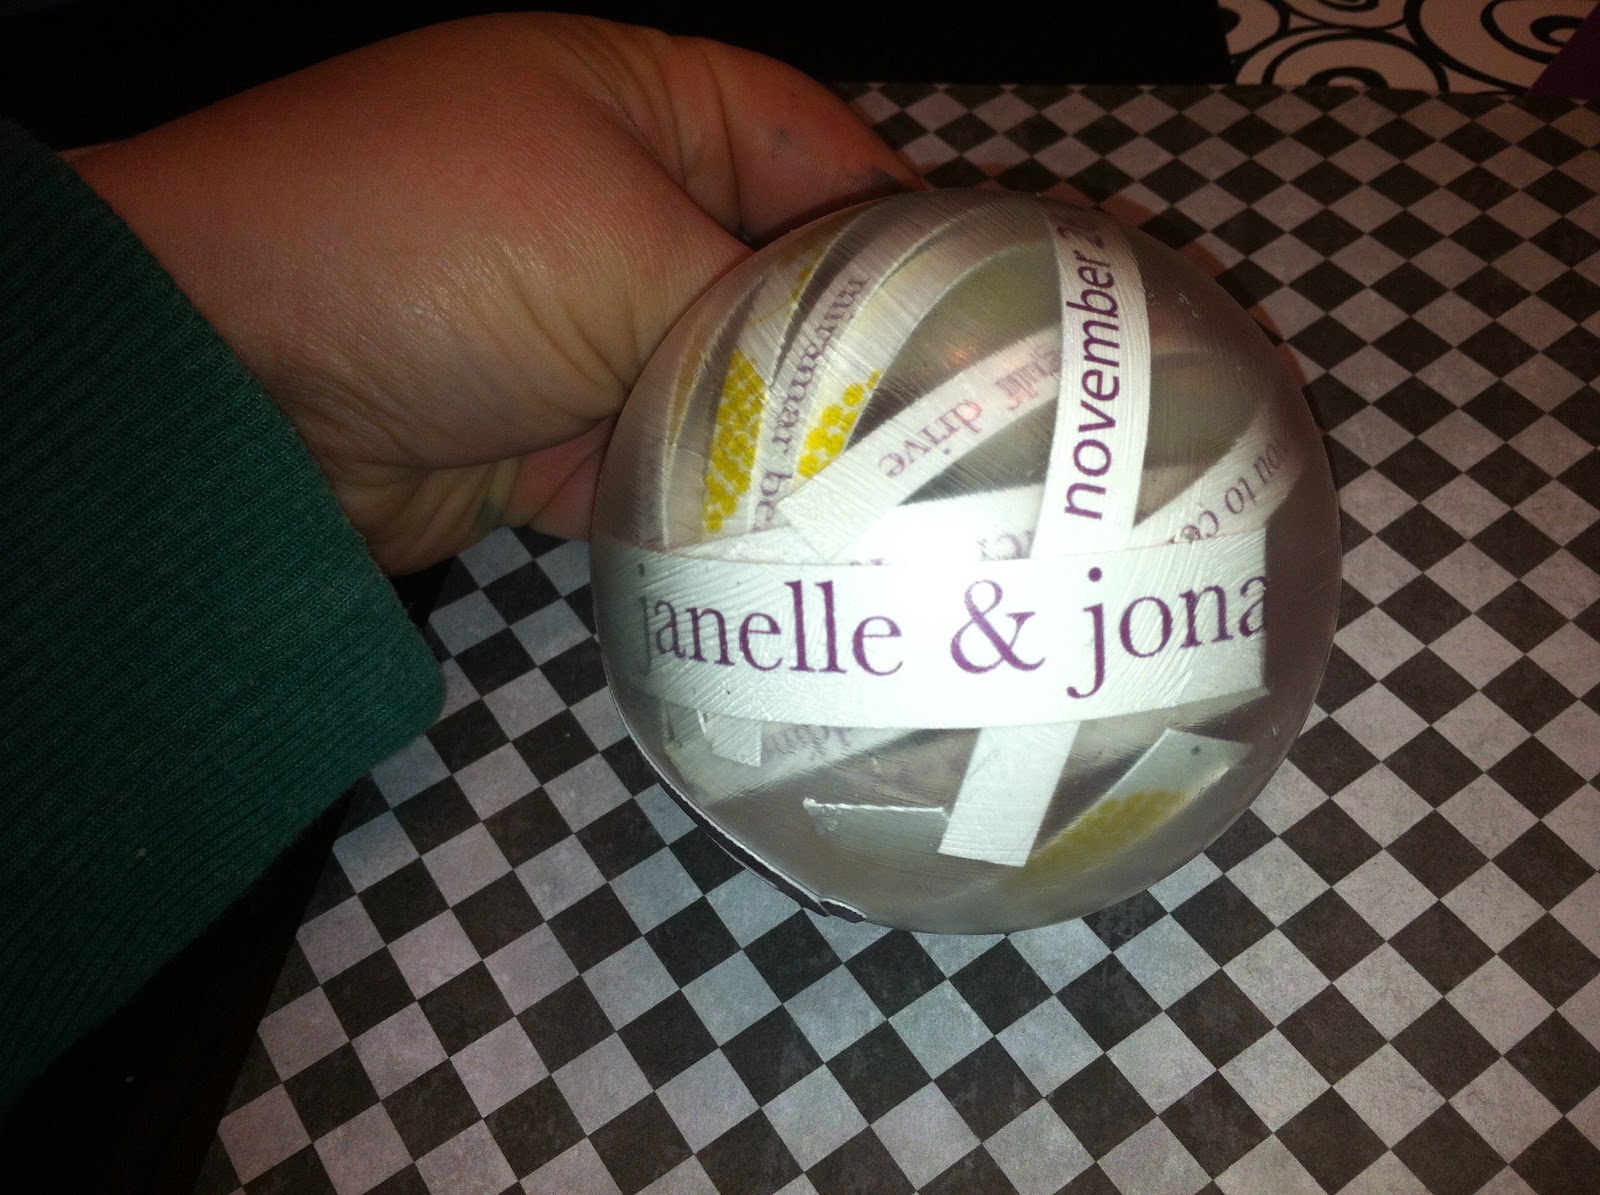
Second, you are going to shred the invite. I worked around the wording, so that it would show through the ornament.
Your stack will look like this:
Then you are going to start "strategically" putting different pieces of the invite in...I waited last for their names, the date and a few good pieces of the flowers and put them in last, so that they would be the most visible. 

I kinda just worked them around with a utensil from my cricut tools. Once I got them arranged I decided to add a little something to it...any excuse to bust the 'ol ball n chain out :)
CRICUT TIME!!!

 I decided to cut a "B" out for Boston and then on the opposite side put the date.
I also added the pearls to go in between the numbers. I adhered the paper with mod podge. It worked well, you kind of had to hold it in place because it was such a slick surface, but they stayed eventually. The only downfall was that the mod podge left "gluey" marks all over the ornament. In the back of my mind I knew it would happen, but I did it anyways....no way around it that I could think of. {I also considered writing on the ornament, but decided against it because I kept messing up on my "practice" bulb".} Well, with no way around the gluey residue, I just painted the glue all around it. It kind of gave it a frosty look. It turned out pretty cute in the end. I was happy with it! 


Monday, November 7, 2011

My Go With Shabby Soul

Well, the past few weeks have been wonderfully crazy! I was able to go down to Aledo, TX for an internship with Shabby Soul. Shabby Soul is made up of two wonderful girls, Brittany and Kasie. I had a blast working with them for 3 days while they were working on a project for Nieman Marcus. It consisted of 5 mannequins that they needed to cover completely with Nieman Marcus magazine clippings. It was a lot of hard work and sticky fingers!! 

Here are a few pictures of the progress we made while I was with them.... ENJOY!!

This is the undressed man-nequin. Doesn't he look amazing? This is not the hair that went on him, we just really enjoy the Bieber look.

This is GLAM!! She is probably my favorite!! We finished her in one, yes ONE DAY!! 

These are the remaining 3 girls: 944, Christmas and InCircle. (All named after Nieman Marcus magazines)

Glam's FAB bling!! Brittany did such a great job!!

Christmas is amazing with the red and white contrast!!

And the crazy 944!! Definitely the wild one of the bunch :) Her skirt is my absolute favorite!! Its made of nothing but necklaces!!

At this point in the process I had to go back home to Oklahoma :(  But I had so much fun with Brittany and Kasie and learned A LOT!! They were so nice for letting me come and join them and I can't wait until I get to go back and help with the other side of their business, interior design and faux finishing furniture! Everyone should check out their website: ShabbySoul.com

Here are the rest of the pictures from the photo shoot!


All 5 of the mannequins!!


Christmas!! She is so chic!!


944 and the lone boy!! 


Christmas' accessories, isn't her bra studding amazing?!?!


Glam! So elegant :) You'll never look at blue the same way again!!


InCircle (aka Green) Cute Dress!


Glam closer up, I love the layering of the necklaces!


Don't you want some sweet suspenders like him? So hot!


944!


Green and Glam!


Did they not turn out amazing?!?! It was so much fun getting to do this!! Thanks again to Kasie and Brittany for taking me under their wing! They are both so talented and I can't wait to go back!! Please take a look at their site or Facebook page: Shabby Soul's Facebook page or ShabbySoul.com! Also, did you not love all that amazing jewelry and studded bras?? It was all done by Gypsy Soule, some good friends of Shabby Soul! Here is their site: GypsySoule.com

Thank you so much for reading and I love you all :)

Saturday, July 23, 2011

Newest Letters!!

Here are the most recent letters I am selling at True Treasures!!! Sorry for the lack of "good" pics....I was running out of time to get someone to take them professionally.


Tuesday, June 7, 2011

Is it JUST me??

          A few weeks ago {part of my very busy month of May} we had a scrapbook night. It was my first "designated" scrap night, so I was pretty pumped. Cricut set and loaded, snacks in cute and decorative bowls {I'm no animal!} and 2 tables set up for all of us to spread out and do our thang!! 
         Well....I don't know if you want to call it crafter's block, ADD or {Welp, That's just MAL} but I just sit there. I have my pics organized, paper picked and even my computer opened to {kevinandamanda.com} scrapbook site AND a layout cheater book. Nothing. My big problem is getting started, I don't know why. With any other project whether its deco our painting I can jump in willy nilly, but scrapping just gets me. 
         During the scrap night I would continually just go over my pictures, or I would make up excuses to show off the Cricut, etc... Mel {my table partner} would get pretty aggravated with me also :/ 
         When I first noticed it, I was working on my recipe book. It was because there are so many different options I have to choose from. Did I want to make one in a regular album {or} a "make your own" style album {or} on cute little recipe cards in a recipe box for my kitchen? Did I want to group them by dessert {or} just do all of them in one lump sum {or} have them alphabetized? So, I decided that I would just hold off until I got more recipes and pondered a bit more on it. If you have any "focusing" ideas to share, I'd be more than happy to take your criticism!!

There were however some successful ones done that night!!
Taryn did hers about her trip to Disney World with her familia! Such a cute page! Unfortunately, this was the only pic I got; but Mel was working on her trip to Rome and Annie was whipping out pages like crazy! {They should rub their productivity off on me next time!!}


ON A MORE PRODUCTIVE NOTE....
I've whipped out a few more projects! 
This is a cross I made for a girl through my {bookie} Kevin :)
It's a 3 layer cross and I am in love with it! Can't wait to make more {and one for myself of course!}


This is a letter I did for a girl in our Bible Study who is getting married!! I LOVE the red and black together!!

Thanks for following and loving my crafts!! You should order one!! :)

I Heart Decoupage!!!

 So, a few months ago, Christy McDonald (my college minister's wife) asked me if I could "redo/copy" a piece of artwork she saw at a church. 

I like to think that it was some kid who I ended up copying....but hey, I'm not claiming that this is an original idea, just one that I worked off of.... :)

I think decoupage is one of the funnest crafty things you can do. Minus the sticky hands it is my favorite thing of all time!! :) 

Here is what I started out with. A 3x4 foot canvas!! It was almost as tall as me! I first mapped/measured out how big I wanted my cross. What I found that was pretty handy was using a laser wall level. It helped in making sure my lines were straight. 


Then, I took my first couple maps and just started ripping. I held back all the blues, because I thought it would be pretty cool to make that just the cross color (as you will see in the bottom pics). I used {four} maps!! A lot more than I thought I'd need for sure!! I wanted to use some that meant something, but I also looked for different colors. Making sure that some were more vibrant than others. I used a map of Oklahoma, Middle East, Israel and The US. I started by just doing all of the outside edges and working in. Then I used all the straight edges and covered the crosses edges. 


Here it is, finished with a coat of lacquer on. Anything you do with decoupage you will want to poly or lacquer it to keep it from catching. 

And the finished product. For this effect I used wood stain, in Walnut (I thing any shade would be ok, I just chose the lightest). It was the first time I've ever used stain, and it runs like crazy!!! Just FYI. I love how the finished product turned out, but I wish I would have used more of a flat surface for the stain, it definitely ran too much, and therefore my circle isn't QUITE how I wanted it; but overall I love it!!

If you do want to try this, or something similar, I suggest using a smaller canvas at first. This was a big project to take on, so if you like quicker projects it would be wiser to choose the smaller canvas. This was a really fun project though!! Let me know if you have any questions!! Hopefully I get a picture of it in the church that I can post too! This piece truly made me feel like an artist :)
Related Posts Plugin for WordPress, Blogger...