Showing posts with label crafting. Show all posts

Thursday, March 20, 2014

DIY Confetti Packets

Lets talk wedding! MY wedding to be specific!

One of the many DIY projects for our wedding were the confetti packets our guests threw at us after we said "I DO".

{Wedding Photography by Caroline Rentzel Photography}


It was last minute. I had seen the idea on my Pinterest feed, but kind of late in our "planning game"; so I just brushed it off. Obviously that didn't work too well. I just HAD to have them! So, about 3 weeks before our wedding I'm making 220 confetti packs...PLUS checking off things on my already lengthy wedding to do list.

Here are the confetti packets that I had pinned for inspiration:


from Oh Lovely Day

and this one, from a wedding featured on 100 Layer Cake

I took a little of both and here is my final product!


What you'll need:
Washi Tape
Glitter card stock
Tissue Paper
Mylar
Card Stock
Glassine Bags
Avery Labels
Glue/Scrapbook tape runners


Step 1. Get your Confetti!


Now, you could buy prepackaged confetti instead of making your own...but I seriously couldn't find any that met my wedding standards. I did look on Etsy, and found some for sale there, but by the time I would have gotten it, it would have been cutting it WAY too close. So, I made my own!

You could also just use one type of paper, but since I was also considering how this endeavor would be photographed I thought various weights of paper would work best. That is why I used heavier paper (card stock) and lighter paper (mylar and tissue paper). 

I used my Cricut (for the first time in FOREVER!) and cut out 1/2", 1" and 1 1/2" circles out of various shades of gold glitter paper and various colors of card stock I bought from Hobby Lobby. Another thing that was impossible to find was two sided glitter card stock. I'm kind of embarrassed to say that I glued (using scrapbook tape runners) the glitter card stock together, so no white was showing. That's what I did for a week straight on my lunch breaks at work.

For the tissue paper, I knew that it was too light weight to run through the Cricut, so I used a 1" hole punch. It dulled out a lot, so I used wax paper to sharpen it. It worked most of the time, but I just say they need to make those puppies sharper! Come on, Martha!!

Mylar: I found it pretty difficult to find sheets of gold mylar. Both Michael's & Hob Lob were always out. So I got creative... At my bachelorette party, my sister had a photo booth backdrop made of fringed gold mylar. Luckily, I got the idea before she threw it way. I just cut the mylar confetti from that.


Me & Hillary at the party...a lot of hilarious things happened that night. Lets just say if you are ever in need of partner for a trivia game, DO NOT go with my sister Molly!

FYI: Organization was key for the confetti. Since it took me over a week to make all of the confetti, I couldn't just leave it out on the table, so I used my Birchbox boxes to separate the different kinds of confetti. To say those boxes are perfect would be an understatement!

Step 2. Washi Tape


I seriously have an obsession with washi tape! It is a game changer in my book. Before it got super popular I bought my washi tape from Cute Tape & Etsy. Now you can get it at Target, craft stores and office supply stores.

I had a few different things of gold washi tape lying around, so I used that and put a piece on the bottom of each glassine bag.Here is the back side of my bags....when doing yours, you'll need to keep in mind if your printing on yours to put the washi tape on the correct side of the bag. FYI..I tried printing and it kept smearing, I guess I don't have the correct kind of printer.


Step 3. Stuff Stuff Stuff!


I bought these  medium glassine bags from Cute Tape. My mom, sisters and I had little stuffing parties, adding a little of each kind in the bags.

Step 4. Labels


I designed the Avery labels on picmonkey, and then printed them off. I had to mess with the sizing of it for the circles. This part was a little frustrating, but after messing with the settings on my printer and consulting with an Avery customer service agent, I got the job done. Fold the bags over and place the sticker on the side with the washi tape showing.

Final product:


 Here are the pictures of our guests throwing confetti at us after we said "I DO"!


I don't regret adding the project at all. The pictures turned out awesome and the confetti landed on the dance floor...perfect way to start off our little celebration!


Sunday, March 3, 2013

Will You Be My...

Welp, It has been a year. A year since I've last blogged. (A Year and 2 days to be exact) Boo me :/ But I have to get over that... I will tell you however that I have thought about blogging at least twice a week and I've even started and have 24 drafts that I just never got around to finishing. So, let me update you about what has happened in the past year...

1) I DID NOT cook 300 new recipes. I definitely did not blog that many. I probably cooked about 100 things new and old, hot and cold, good and well, disgusting.

2) I've had my own business for a year! Crazy. It has been weird. It has been hard. I still don't have all my *ish* figured out. (Obviously...in my dream world, I'd blog at least once a week!) But most importantly I have learned about what it is to succeed and fail at various things. (On that note....anyone want to help me with financials/taxes...yikes! Give me a paint brush any day!)

3) I'm ENGAGED!!!! What? Who? When? What? YES! On January 26 my Jakey proposed! That was a huge pusher on starting to blog again. I couldn't not share my planning process. I LOVE weddings, not necessarily the lovey dovey part of it all (although that is all wonderful); I just love the different design ideas and planning, and where you bought your dress and which etsy store you bought what from. What did you DIY and what was your favorite splurge? I LOVE looking at every one's wedding albums and finding all those little details in the centerpieces that I know the bride fretted over for 3 whole days. :)

So....let the blogging begin! I can't wait to share my details with you. Any meals that I may work up, crafts, Pinteresting Finds, Inspiration, ETC!

Lets start off with my Bridesmaids! I had to figure out a fun way to ask them and I saw this:


You can find the tutorial {here}.

Watercolors are so big right now and I just had to channel my inner kindergartner! And let me tell you, being a kindergartner is hard! Ok, not really, but watercoloring wasn't as easy as I thought it would be! I'm not the best blender and that fancy design....psh! Couldn't do that either.

In their tuto, they say to use a wax pencil, which I found in the painting supplies. I don't know if my paint to water ratio was off, but it just didn't come through like I'd prefer.

So, here it is with the fancy $5 wax pencil thing. Just not as bright as I wanted, or expected. :( It later became a doodle pad.


Then I had the bright idea to try a white crayon. It worked a lot better, but I just wasn't as excited with how it was turning out. At this point I had been doing this for 3 hours, with no end in site. I just hated having to retrace each one when it would mess up :/


So I decided to print them. You'd still be able to see it and I'd be able to to the watercolor. So, here are how they turned out! I loved them, I just wish I could have the fun design around it....maybe one day when I can check off the photoshop class off my list...ugh!


I realized later the spelling error in Bry's... OOPS! Hopefully my 3 year old nephew won't notice! When he called to 'accept' he said "I don't want to be a ring bearer, I want to be your flower boy!" HAHA, he's hilarious! He's so cute, he can be whatever he wants!! 


I made 13 of these bad boys! My list of ladies (and a few gents) are:
Hillary: MOH and sister
Molly: MOH and sister
Jordan: MatOH and bestie
Christi: Bridesmaid and friend
Katie: Bridesmaid and friend
Ashley: Bridesmaid and friend
Kortny: Bridesmaid and SIL
Emma: House Party and Future SIL
Jennifer: House Party
Laura: House Party
Rachel: House Party

Bryson: Our cutie Ring Bearer/ Flower Boy/ Party Starter
Andy: Marrying us!

Jake hasn't "officially" asked anyone yet...shocker :) I think that step is a little more awkward for boys!

The tuto also shows you how to make envelopes. They turned out awesome! I had glitter everywhere....including my hair.


Welp guys....sorry for the 1 year absence. Can't promise it won't happen again, but hopefully not too soon :)

Wednesday, January 18, 2012

Muslin Pillow

This post is long past due. Like, before Thanksgiving past due. But I have a very good reason. I was very mad at this pillow for a long time, and I've finally forgiven it enough to write about it. I got so frustrated during this {super simple} sewing process. Nothing was going right, it was kind of late at night and my mom {who is experienced} kept skipping steps in the tutorial we loosely followed and I would get confused. It turned out well in the end and it is dang cute on our new couch!

Here is my finished product

I got the inspiration {HERE}. We used her basic measurements, but mom kind of had me go on my own...so we just kind of played it by ear. 

I don't know if I was just not in a sewing/crafting mood, {I had just finished my Lamp ReVamp and may have been just tired} but I just was losing patience too easily. 

Right now it is on our brand new couch as decoration only. No one is allowed to use it, regardless of how soft the pillow or how gentle they "promise" to be. I worked too dang hard!! :)

Here is my tutorial...this is not going to be quite step by step, or 100% accurate terminology, but I'll attempt....it has been 3 months after all ;)

Supplies:
18in pillow, pillow form, or pillow stuffing. {I used stuffing}
Hot Glue Gun {for the fabric flowers}
1 yard muslin {this includes the muslin fabric flowers}
At least 20 inches each of 3 other fabrics 
      *If you look at the other tutorial, you will see her measurements done like this:

          So, in MY mind I could of had them cut just 4 inches, 2.5 inches & 5.5 inches....simple and cheap. 
          Well, Thank goodness mom was there because she mentioned that your pattern runs length wise, so 
          you need to cut the 19/20 inches length wise on patterns that matter. All 3 of my patterned fabric ran    
          length wise, whereas really only her green and brown damask one did.


We did the front side of the pillow first. You can use however much of each fabric you want, but with an 18 inch pillow we decided to do about 7 inches muslin and split the rest of the 11 inches between the other 3 fabrics, kind of depending on how big their design is. 
For instance, we wanted all of this heart pattern on the pillow. Make sure you cut at least 1/2 inch extra on each side to make room for your stitch.


This was probably the point where things went crazy....with the kind of technology there is today, you would think sewing machines would become slightly more user friendly!! Once started sewing, I kept going crooked or my thread would mess up....it was disastrous! 

Now you will want to pin together your fabrics, make sure your fabric all folds the same way, so there is no weird bulging. Like this...

This stitch was optional, it is just for decoration and a little extra reinforcement.

I don't have any pictures of the back, but we did an "envelope" closure and sewed on buttons for decoration. You just sew two 9 inch strips to each side and have the extra meet in the middle. Stitch the bottom of each and then stuff. 

I also did 3 muslin fabric flowers and put a pearl in the middle of them. Sorry, I was super irritated at that point and was not in the snapping pictures mood. 

Like I said, this is definitely not the greatest tutorial, but one day when I become an actual *seamstress*, I'll be able to do more step by step instructions. 

Here is the finished product! Super proud, and so not in a hurry to tackle sewing again quite yet :) 


Monday, December 5, 2011

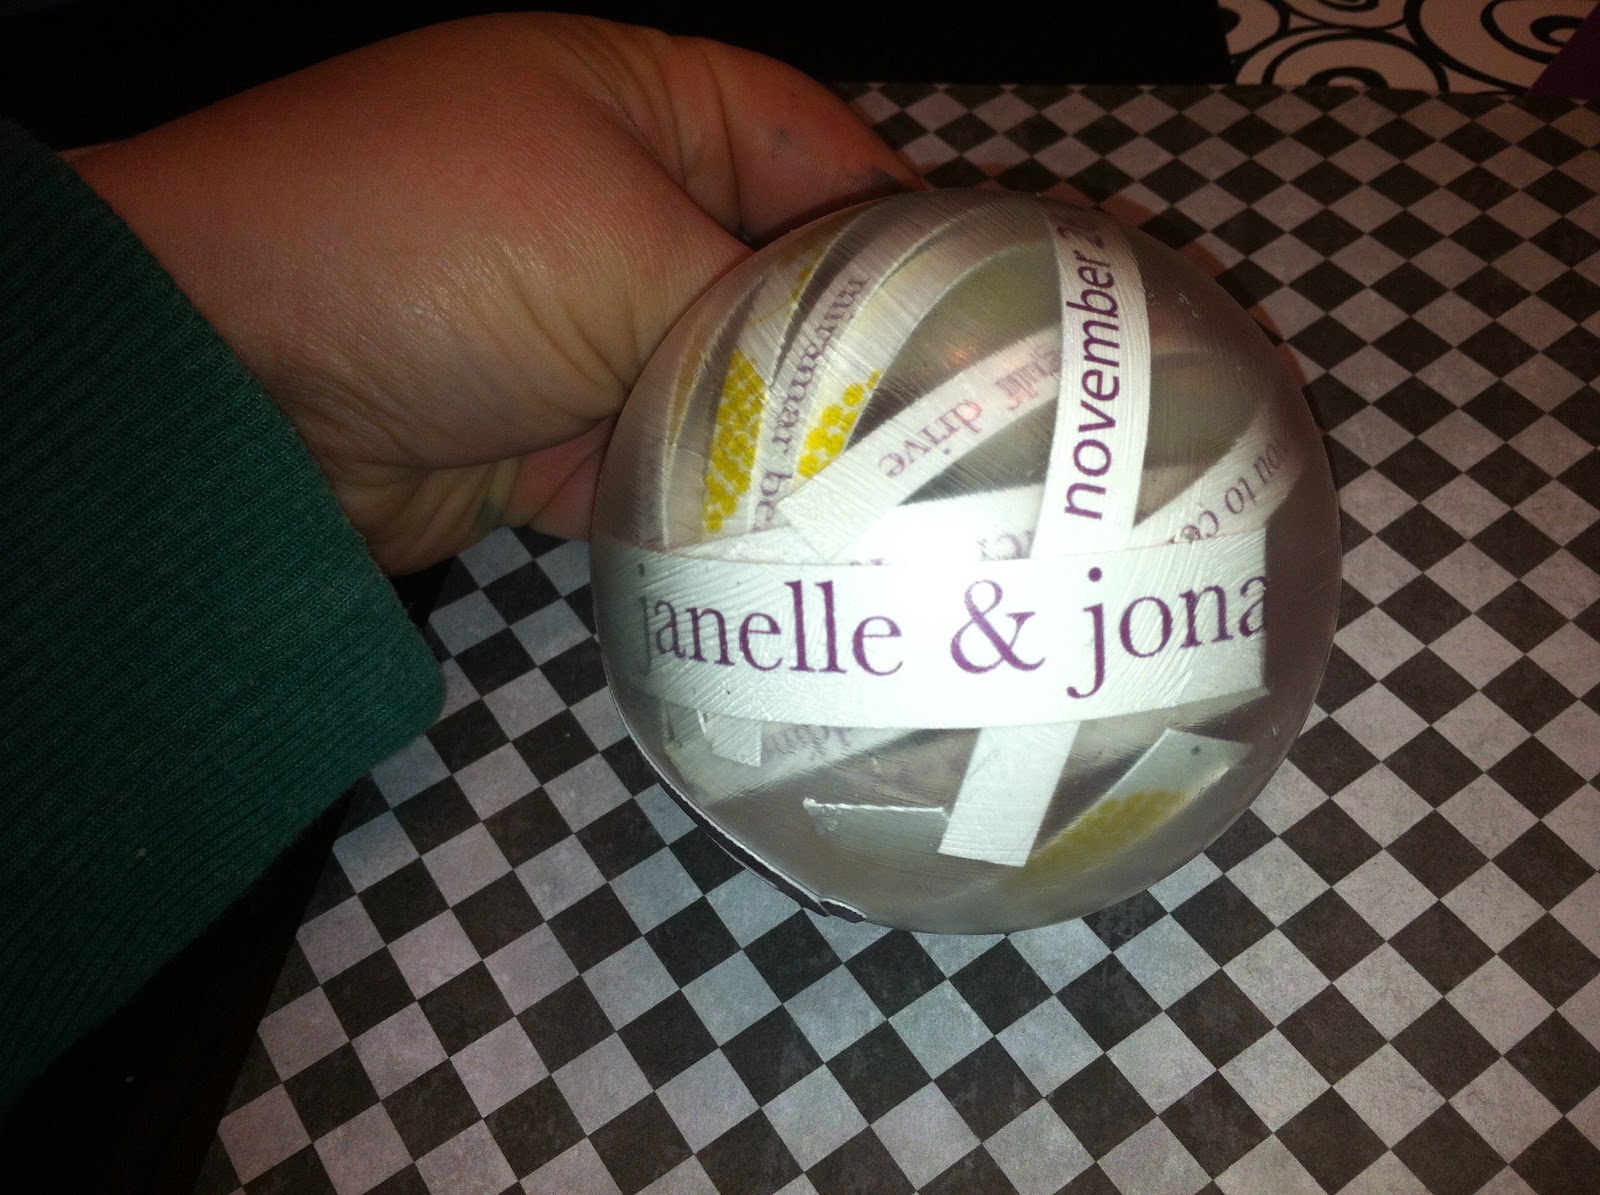
Wedding Invite Turned Christmas Ornament!

Shocker...Another Pinterest inspired project. I may never have another original thought again... Oh well, this is the one that I've seen on Pinterest: 
Really cute, but I really wanted to see more of the wording on through the ornament.

First you get you invite. 
Super fun wedding by the way :) Aren't their invites cute? I love the flowers!

Second, you are going to shred the invite. I worked around the wording, so that it would show through the ornament.
Your stack will look like this:
Then you are going to start "strategically" putting different pieces of the invite in...I waited last for their names, the date and a few good pieces of the flowers and put them in last, so that they would be the most visible. 

I kinda just worked them around with a utensil from my cricut tools. Once I got them arranged I decided to add a little something to it...any excuse to bust the 'ol ball n chain out :)
CRICUT TIME!!!

 I decided to cut a "B" out for Boston and then on the opposite side put the date.
I also added the pearls to go in between the numbers. I adhered the paper with mod podge. It worked well, you kind of had to hold it in place because it was such a slick surface, but they stayed eventually. The only downfall was that the mod podge left "gluey" marks all over the ornament. In the back of my mind I knew it would happen, but I did it anyways....no way around it that I could think of. {I also considered writing on the ornament, but decided against it because I kept messing up on my "practice" bulb".} Well, with no way around the gluey residue, I just painted the glue all around it. It kind of gave it a frosty look. It turned out pretty cute in the end. I was happy with it! 


Related Posts Plugin for WordPress, Blogger...