Wednesday, August 7, 2013

The BIG 10,000!!

Well guys, this past week I accomplished something HUGE. Well, maybe not huge....its a little more like: hmmm....what does she do with her time? Or does she have a job? How does her phone still have charge? No...not Candy Crush. Pinterest! I, Mallory McGuire (soon to be Stewart), have PINNED 10,000 PINS!!!


I of course had to take screen shots of this momentous occasion! Don't Pin? Know how excited you get when your car reaches 9,999 miles...and then turns to the 10,000 mile mark? Don't you want to be on some exciting vacation when driving that one mile? I sure would!

That's exactly how I treated my 10,000th Pin! You ready for this.... 


Don't be shocked by the time stamp. We've already established that I've replaced sleeping with Pinterest. I had to make sure that I pinned something awesome. Well, let's get real, everything I Pin is awesome ;) But I wanted it to be something that I love...that is current in my life right now. 


Here is the pretty pretty living room I chose. I can not even begin to tell you how excited I am to live in mine and Jake's first home. I can't wait to decorate it, over decorate, choose wrong paint colors, too big of furniture, make Jake cringe at some of my decorating choices, making myself cringe at some of my decorating choices. And so on. 

My point is that I realize that my home will never look like the one above. And when it does I'm sure we'll have a baby soon after and then it will NEVER look like it! 

Some of the things I LOVE about this set up is: 

1. The focal wallpaper. LOVE! I love that wallpaper is back. I'm sure it will be "out" tomorrow, but I'm glad its back today. I want a wallpaper wall so bad! 

2. Animal hide rugs. I fell in love with one at market a few years ago, and haven't gotten it out of my mind. It has gold and silver splatter paint marks all over. I think it is the perfect combination of Jake and mine's style mash-up.

3. The plant. I have always like indoor plants. Not your momma's fake plants. Real ones. Whether it is a centerpiece of garden hydrangeas or succulents or a tree like the one here. 


Thanks for those of you who follow me on Pinterest. I have a lot of fun looking through other people's pins and seeing what we do and don't have in common! 

I hope ya'll enjoy my Pinterest page as well! 


Friday, July 19, 2013

Addressing Envelopes

So my first big DIY wedding task was addressing my Save the Date envelopes.

I know what you're thinking....not exactly a "DIY". Well, for those of us who can't figure out the whole "mailings" part of Microsoft Word, tune on it!

First off, lets start with my inspiration. Hashtag shocker....it's from Pinterest. Typography is everywhere on there. From basic stationary to wedding signage to gift tags. I'm obsessed! Here are just some of my faves...


Whew! My heart swoons for this envelope! This is from Etsy. I SO wish it was in my budget to have this done. I wish even more that I could do this myself!!


{http://www.stylemepretty.com/2012/12/04/tulsa-oklahoma-ranch-wedding-from-imago-vita-photography/#}

This is from the Style Me Pretty site. Could you imagine how AH-MA-ZING your pictures would be if you had this bad boy behind you?


{http://www.stylemepretty.com/living/2012/09/14/diy-vanilla-sugar-favors-from-kimbry-studios-photography/}

Also from SMP. Adding a simple tag like this adds so much to a favor.

I love to see different fonts put together. It gives it a very modern touch and personalizes the most basic aspects. OK, I got off track there for a little bit...

Here are my STD...


My friend Keith designed them for us. He's pretty awesome. 


And our envelopes! I ordered them through Vistaprint.com. I had our return address printed on them, which was pretty awesome and a time saver.

What I did was downloaded an A2 and A7 template from this site: {http://www.archiversonline.com/pages/templates.} They have a lot of different templates that you should check out as well. 

Then you open up the file and since my envelope had a pre-determined box, I had to play with my layout for a little bit. And if you're anything like me, you have a 1,000 different downloaded fonts that you have to choose from! I get a lot from kevinandamanda.com. They have a lot of fun ones that look like handwriting. I tend to go for the less formal calligraphy fonts. Picking a font took about an hour...I had to go through and see what different "Ms" looked like, and find one that the numbers were fun also. I MAY have a tendency to over think these things :) 

This is time consuming. I'm not going to lie.... But I created a folder with individual files of each person's address. It makes this a one time process and when it comes to addressing envelopes for the actual invites and thank you notes it will be ready to go for you. Just plop down in front of your newest netflix addiction and take off! 

I can't even tell you how excited I am that I have figured this out. I realize that this may only be cool for me....but man I am excited!! 

My next wish is for a font/template that would help you create an envelope like the first one I showed you. If I could guess it will probably be all over Pinterest the day after I get married....Classic! 

Hope this helps those who are challenged in this area. And sorry I got so distracted...but hey, I just like sharing pretty things that I find :) 

-Mal

Sunday, June 30, 2013

MMM....Bell Peppers!

Lately I have really been trying to eat healthy. With the wedding on the way Jake and I are trying to get into shape! One of my latest snack obsessions is bell peppers. I LOVE them! Grilled or raw. The only problem was I REALLY liked dipping them in ranch...which is a no go if you're trying to eat healthy. Well, in walks Pinterest with yet another fix to my problems!

Several months ago I pinned {THIS Faux Ranch Dip} onto my Healthy Choices board. I always had it in the back of my mind and finally decided to try it. 

Guys. 

Look at me in the eyes right now. 

THIS RANCH IS AMAZING!!!!!!! 

All you need is 0% Greek Yogurt, Fat Free or 1% milk and a Ranch packet. I use Fat free milk always, so that's what I used. You take 1 cup of Greek yogurt, 1/2 (or a little less) cup of milk and a ranch packet. The amount of milk decides your consistency, so if you are wanting it for a dressing add a little more milk. 

I was really excited about this. I went through 3 bell peppers and 1 cucumber and still had half of it left! 


Another pin I found was {THIS Mini Pepper Nachos} one. I didn't follow everything she suggested, but it inspired me to make my own nacho creation! 


This is a pic of her nachos. I would have LOVED to show you a pic of mine...but we ate them too fast :) But trust me, I'll make them again soon. Maybe tomorrow. In which I'll post a pic :)

Here's what I did....

Ingredients:
Bag of Mini Peppers (found in your produce section)
1lb ground beef
taco seasoning
1 can of Rotel
shredded cheese

1) Preheat oven to 350 Degrees
2) brown your meat, drain excess fat and follow Taco Seasoning packet directions
3) While meat is cooking, half all the peppers and take the seeds out
4) drain the Rotel, and add the can to the ground beef
5) On a baking sheet lay down foil and place peppers on it (press the peppers a little so they flatten)
6) fill each pepper with the meat filling and then top with cheese
7) slide them into the oven for about 8 minutes, until cheese is melted

Both the ranch and nachos were Molly approved...and we had a fun last night as roomies together. Little sis is moving out! 21. New job. New place. She is acting adult like and its weird :) 

I'm not going to lie....we definitely finished off the ranch and dipped our nachos in them. From now on I'm gonna make that stuff in bulk! 

Wedding craft blogs will come soon....we haven't done a ton yet...but soon! 

-Mal


Sunday, March 3, 2013

Will You Be My...

Welp, It has been a year. A year since I've last blogged. (A Year and 2 days to be exact) Boo me :/ But I have to get over that... I will tell you however that I have thought about blogging at least twice a week and I've even started and have 24 drafts that I just never got around to finishing. So, let me update you about what has happened in the past year...

1) I DID NOT cook 300 new recipes. I definitely did not blog that many. I probably cooked about 100 things new and old, hot and cold, good and well, disgusting.

2) I've had my own business for a year! Crazy. It has been weird. It has been hard. I still don't have all my *ish* figured out. (Obviously...in my dream world, I'd blog at least once a week!) But most importantly I have learned about what it is to succeed and fail at various things. (On that note....anyone want to help me with financials/taxes...yikes! Give me a paint brush any day!)

3) I'm ENGAGED!!!! What? Who? When? What? YES! On January 26 my Jakey proposed! That was a huge pusher on starting to blog again. I couldn't not share my planning process. I LOVE weddings, not necessarily the lovey dovey part of it all (although that is all wonderful); I just love the different design ideas and planning, and where you bought your dress and which etsy store you bought what from. What did you DIY and what was your favorite splurge? I LOVE looking at every one's wedding albums and finding all those little details in the centerpieces that I know the bride fretted over for 3 whole days. :)

So....let the blogging begin! I can't wait to share my details with you. Any meals that I may work up, crafts, Pinteresting Finds, Inspiration, ETC!

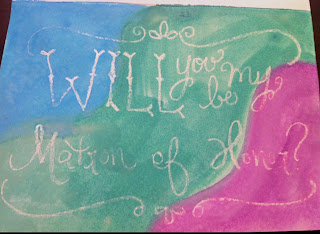
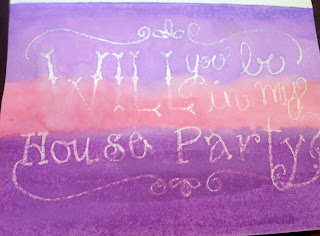
Lets start off with my Bridesmaids! I had to figure out a fun way to ask them and I saw this:


You can find the tutorial {here}.

Watercolors are so big right now and I just had to channel my inner kindergartner! And let me tell you, being a kindergartner is hard! Ok, not really, but watercoloring wasn't as easy as I thought it would be! I'm not the best blender and that fancy design....psh! Couldn't do that either.

In their tuto, they say to use a wax pencil, which I found in the painting supplies. I don't know if my paint to water ratio was off, but it just didn't come through like I'd prefer.

So, here it is with the fancy $5 wax pencil thing. Just not as bright as I wanted, or expected. :( It later became a doodle pad.


Then I had the bright idea to try a white crayon. It worked a lot better, but I just wasn't as excited with how it was turning out. At this point I had been doing this for 3 hours, with no end in site. I just hated having to retrace each one when it would mess up :/


So I decided to print them. You'd still be able to see it and I'd be able to to the watercolor. So, here are how they turned out! I loved them, I just wish I could have the fun design around it....maybe one day when I can check off the photoshop class off my list...ugh!


I realized later the spelling error in Bry's... OOPS! Hopefully my 3 year old nephew won't notice! When he called to 'accept' he said "I don't want to be a ring bearer, I want to be your flower boy!" HAHA, he's hilarious! He's so cute, he can be whatever he wants!! 


I made 13 of these bad boys! My list of ladies (and a few gents) are:
Hillary: MOH and sister
Molly: MOH and sister
Jordan: MatOH and bestie
Christi: Bridesmaid and friend
Katie: Bridesmaid and friend
Ashley: Bridesmaid and friend
Kortny: Bridesmaid and SIL
Emma: House Party and Future SIL
Jennifer: House Party
Laura: House Party
Rachel: House Party

Bryson: Our cutie Ring Bearer/ Flower Boy/ Party Starter
Andy: Marrying us!

Jake hasn't "officially" asked anyone yet...shocker :) I think that step is a little more awkward for boys!

The tuto also shows you how to make envelopes. They turned out awesome! I had glitter everywhere....including my hair.


Welp guys....sorry for the 1 year absence. Can't promise it won't happen again, but hopefully not too soon :)

Related Posts Plugin for WordPress, Blogger...